Tuesday, August 31, 2010

Tasty Tuesday! GF Braised Lamb Shoulder

What a wild and crazy weekend we had for the end of August!!  Friday night was spent in a favorite pastime for my boys and I, bowling, which we don't do nearly enough of.  They are both under 10 so I am still enjoying cool dad status at this point and loving it.  My oldest is already taking the phrase "I know dad!" for a test drive so he's starting early.....Sigh!.....Lol. 

Friday night was filled with bowling and pizza, Saturday after lunch we had a family get together that took a good part of the afternoon, and Sunday we went to the lake with my oldest friend and his family, cooked, and then went out on his boat.  My friend tells me that I am welcome any and every time but I have to bring my Dutch Ovens!  He is a recent convert and we often get together and have large cookouts.  So I brought the ovens and made a big breakfast casserole with ham and homemade buttermilk biscuits.  After breakfast we cleaned up the dishes and the boys rode bikes around the campsite and made friends with all the kids in sight.  Their were other boys there very close in age to mine so everyone had a great time.

It's one of those weekends that was jam-packed, fun and super busy, but you have to come back to work just to rest!!  I had a lot of ingredients laid out for a Dutch Oven recipe but due to events beyond my control I am chair bound on this beautiful Tuesday with very little freedom to move, or wiggle for that matter.  I excercise regularly, lift weights and also walk about 3 times a week, at a brisk pace, usually 2 miles at a time to keep old age and gravity at bay.  I took the requisite walk last night and everything went fine until I got back home.  I was bent over slightly looking for something when my lower back tightened up on me for no obvious reason.  It has continued to tighten and frustrate until I have to move very carefully doing only that which is absolutely necessary.  I promise more Dutch Oven recipes in the coming weeks but I didn't feel up to the bending, lifting, and stirring today....

This week's post is another great recipe from Michael Fusco's Riverside Grill in Tulsa, OK.  As most of you know, Michael is a family friend, 5 * chef, and has a fantastic restaurant in Tulsa that amazes me everytime I eat there.  He holds cooking classes several times a year and gladly shares his fabulous recipes with all who attend.  This recipe is a Braised Lamb Shoulder that takes some time to prepare but is worth every minute!

For this recipe you'll need a large Dutch Oven or brazier--one that's big enough to accommodate the meat and stock, and safe for both stovetop and oven.  Make sure it has a tight fitting lid as well.

Prep Time: 30 minutes

Cook Time: 4 hours, 30 minutes

Total Time: 5 hours

Ingredients:

5 lbs boned, rolled shoulder of lamb, excess fat removed.

1/4 cup vegetable oil

1 large onion, peeled and chopped

2 medium ribs celery, chopped

1 large carrot, peeled and chopped

1 cup canned tomato puree (or canned crushed tomatoes)

5 cups brown stock or lamb stock

1 bay leaf

1/2 tsp dried thyme

3-4 fresh parsley stems

Lavender (wonderful aromatic)

6 whole black peppercorns

salt, to taste

1/2 cup rice flour

This recipe is excellent with Lamb shoulder but beef works very well also.  Shoulder, bottom round, shank, or any other large muscle would work well.  You want to trim off excess fat but leave the collagen on the meat.  When it is cooked in water over many hours, it breaks down to form gelatin, which is very nutritious.

You must have a large, heavy guage pot or Dutch Oven for this recipe. 

Preparation:

Preheat oven to 350 degrees F.

In a heavy, cast iron dutch oven or brazier, heat your oil over high heat, then add the lamb and sear it thoroughly, using a pair of tongs to turn it.  When a nice brown crust has developed on all sides of the meat, remove it from the pan and set aside.

Tip: To enhance the browning of the lamb, pat off excess moisture with clean paper towels before searing it.

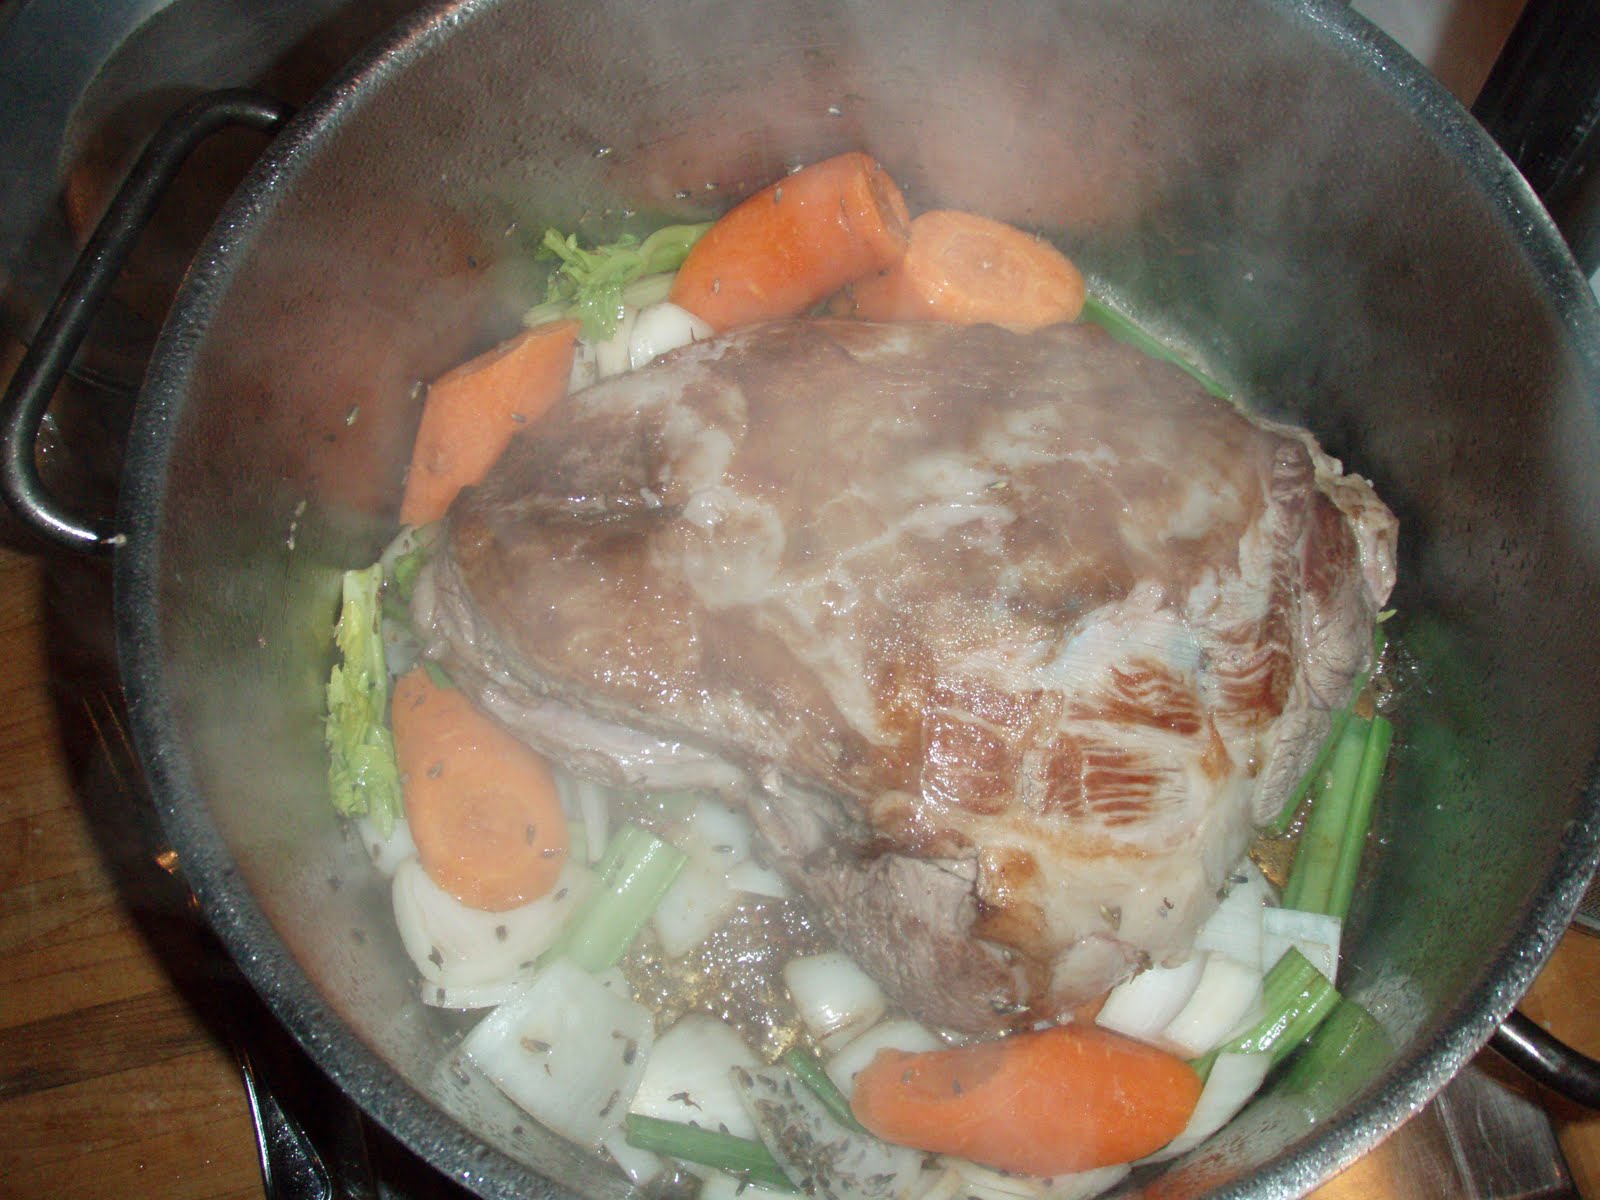
Add the carrots, celery and onions to the pot and cook for about 5 minutes, until the onion is slightly translucent.

Return the lamb to the pot and add the tomato puree, stock and herbs.  Heat on the stovetop until the liquid comes to a boil, then cover with a tight-fitting lid and transfer the whole thing to the oven.

Cook 4-5 hours or until the lamb is tender.

Remove pot from oven, take out the lamb and set it aside, covered, while you make the sauce.

You'll see a layer of fat on top of the braising liquid.  We're going to use this fat to make a roux for the sauce.  Skim off as much fat as you can, saving about a 1/4 cup of it.  You can discard the rest, as it would make the sauce too greasy.

Heat the fat in a separate saucepan, then gradually stir in the flour until a paste forms.  Heat for a few minutes, stirring until the roux is a rich brown color.

Return the remaining braising liquid to a boil, reduce to a simmer and whisk in the roux.  Reduce for about 15 minutes, then strain through a fine mesh sieve and season to taste with Kosher salt.  Slice the lamb across the grain, arrange on warm plates, sauce generously and serve right away.

This dish was sooo good and I ate every bite!  Many people discard them but the leaves of the celery are very useful as aromatics, so leave them in!  You might wish to add small baby carrots as the larger ones can be bitter.

Enjoy!

This post is part of the following blog carnivals.....Go check out these great sites!!

Monday Mania
Mouthwatering Mondays
Two for Tuesdays
Slightly Indulgent Tuesday
Tuesday Twister
Gluten-Free Wednesday
Pennywise Platter Thursday
Recipe Swap Thursday

Friday, August 27, 2010

The Mighty Powers of Magnesium

Once again this week has flown by much like all of the other weeks this year.  I seem to be unnaturally sleepy today so I have to really give my motivation a kick in the pants to get going.  I went to bed at a decent hour and got up around 7 as usual but I had some dreams that kept waking me up.  Grrrrr.... 

I got a massage yesterday from an extremely talented lady named Bernice.  She is a family friend and has been doing massage for more than 15 years.  She doesn't give the rub a dub dub massage but she really works on your problem areas and will get all of the kinks, cricks, and trouble spots lined out.  I think some of the problem with my get up and go is soreness from all of the lactic acid buildup currently being flushed from my body.  I just have to keep drinking lots of water and tomorrow will be awesome!

Today I wanted to touch on a mineral that is one of the most abundant in our world.  It is absolutely vital for proper bodily function and is used in over 300 enzyme reactions.  It is present in every one of us and is used by the cells to make energy and stabilize membranes as well as being critical to bone and muscle health. 

What is this all-important mineral??  Magnesium  According to countless scientific studies, the majority of the population is deficient in it.

Read this interesting article from It's Better Now by Ian Robinson, Managing Editor of NHD "Health Watch" on the powers of magnesium...

The Mighty Powers of Magnesium


Did you know that deficiency in just one mineral can cause anxiety… diabetes… even heart disease?

In fact, deficiency in this mineral makes you twice as likely to die, according to findings published in The Journal of Intensive Care Medicine. And the bad news is that 80 percent of Americans are deficient in it.

The mineral we’re talking about is magnesium.

Medical experts agree that magnesium is essential to a long and healthy life. “In my practice, this nutrient is one of my secret weapons against illness,” says Dr. Mark Hyman, who serves on the Board of Advisors of Georgetown University and operates a practice in Lenox, MA. “Yet half of Americans are deficient in this nutrient and don’t know it.”

“I remember using magnesium when I worked in the emergency room,” says Dr. Hyman. “It was a critical ‘medication’ on the crash cart. If someone was dying of [an] irregular heartbeat, we used intravenous magnesium. If pregnant women came in with seizures, we gave them high doses of magnesium.”

And he’s not alone in praising magnesium.

“Magnesium deficiency triggers 22 conditions,” says Dr. Carolyn Dean, M.D.

Dr. Dean is a magnesium expert: she’s led medical research on it for over 30 years. She currently serves as the Medical Director of the Nutritional Magnesium Association and wrote The Magnesium Miracle.

Miracles of Magnesium

Magnesium triggers over 300 enzyme reactions and is present in all bodily tissues. It’s critical to bones and muscle. Your cells use it to make energy and stabilize membranes.

It fights depression, fatigue, and even kidney disease. And it’s essential to many essential bodily functions.

So… if magnesium is so beneficial to health, why don’t we hear more about it?

“This mineral is ignored because it is not a drug,” says Dr. Hyman. “It is more powerful than drugs in many cases. That’s why we use it in hospitals for heart failure.”

Dr. Dean agrees. She believes the drug makers have financial reasons for keeping it under the radar.

“Most of the funding for medical research comes from drug companies,” she says. “Magnesium is not a drug and will not be studied by drug companies. Except to try to disprove its action.”

And magnesium deficiency often goes under the radar because it’s hard to detect.

“In our society, magnesium deficiency is a huge problem,” says Dr. Hyman. “By conservative standards of measurement (blood or serum magnesium levels), 65 percent of people admitted to the intensive care unit have magnesium deficiency.

“But this underestimates the problem. A serum magnesium level is the least sensitive way to detect a drop. So rates of magnesium deficiency could be even higher.”

And that’s bad news for good health. Magnesium deficiency has been linked to migraines, inflammation, and high CRP levels.

A Million Year Old Volcanic Rock That Outsmarts Heart Disease…

One of the doctors featured in this report had such a weak heart that he couldn’t even walk up a flight of stairs.

Now, thanks in part to this million year old volcanic rock, he can bike straight up a mountain… in the middle of a desert.

Click here to read the full story and other amazing stories of health breakthroughs that are saving lives today.

Why Our Society Is Magnesium Deficient

It’s a scientific fact that modern man is deficient in magnesium. One recent study concluded…

It is regrettable that deficiency of such an inexpensive, low-toxicity nutrient results in diseases that cause incalculable suffering throughout the world.

So why are we so deficient? What’s changed?

As is often the case, our own diets work against us. Highly processed foods contain little magnesium. Carb-rich foods like white flour and pasta have no magnesium at all. Neither does dairy.

Worse, many of the foods we do eat reduce our levels. Dr. Hyman says alcohol, salt, cola, and coffee all reduce magnesium. And our modern lifestyle does the same: stress, antibiotics, and diuretics decrease our levels too.

Another reason we have low levels is because it’s hard to absorb. Worse… our bodies lose it easily. That’s why it’s important to supplement our magnesium intake.

Supplement Your Diet

Many foods are rich in magnesium. Good sources include:
          » Almonds
» Cashews

» Walnuts

» Shrimp

» Green drinks

» Leafy green vegetables

Dr. Hyman suggests taking a supplement. While the recommended daily amount is about 300 mg a day, he believes most of us get less than 200 mg. And he says that most people could benefit from as much as 400 – 1,000 mg a day.

Another good option for kicking up your levels are Epsom salts. Taking a hot bath in Espom salts (magnesium sulfate) helps reduce stress and allows easy absorption of magnesium.

Both doctors Dean and Hyman suggest that magnesium citrate, glycinate taurate, and aspartate are the most easy to absorb. They caution against magnesium carbonate, sulfate, gluconate, and oxide because they are more difficult to absorb.

Dr. Hyman also notes that people with kidney or heart disease should consult a doctor to define safe levels.
          To your health,

Ian Robinson,
Managing Editor
NHD “Health Watch”
I was familiar with magnesium before I found this article but I learned even more by reading it!  They say you should learn something new everyday so WooHoo!  I'm done for the day!!  All kidding aside, there are many minerals and nutrients that are absolutely essential for proper health and magnesium is only one of them.  Could you be magnesium deficient?  I was and take an all natural supplement called Magnesium Complex from Nature's Sunshine Products.  We sell Magnesium Complex on our shopping cart and offer shipping to the lower 48 states for one low price.  Have you ever taken Magnesium supplements?  If so, what were your results?

Thursday, August 26, 2010

Break The Mold Part 2 - Bodyweight Excercises

I promised I would continue this thread sooner than now, specifically the next week but, alas, I didn't get it done.  I am, however, falling under the two week mark so woohoo!  In my first excercise blog post, Break The Mold Friday, I touched on building muscle by lifting light weights instead of heavy ones and achieving the overall goal without undue stress, strain and injury.  You should check it out and also read the study article that was the basis of the post. 

In this post, I promised to give you, the readers, some very simple and extremely effective bodyweight excercises that you can do in the comfort of your own home, without the cost of a gym membership, expensive equipment that ends up as a clothes line, etc....  All you need for most any excercise are some comfortable workout clothes, (shorts or sweats, t-shirt, good shoes) and a rubber or foam mat that you can pick up at most any retailer such as Wal-Mart, etc. for around $20.00.

You don't have to look like Tony Horton or Denise Austin to do these core excercises at any stage of your life.  It doesn't matter if you run marathons or have never done anything other than walk to the car, you will benefit from these programs.  They are NOT exciting, fun, glamorous, or easy.  You will, however, feel the benefits from doing them and when you stick with them, see the results as well.  After you master these, you can easily do other, more advanced excercises and be in the absolute best shape of you life.  Many people choose to do aerobics, pilates, yoga, kettlebells or some other excercise as part of a group effort.  You can also do the same.  Call your friends, neighbors, wives, husbands, etc to join in with you.  Almost anything you do as a group will have a more positive impact and keep you motivated to the final goal.

Ok! With the pep talk out of the way, lets get to the fun stuff!  This first bodyweight excercise is what is called a CORE excercise.  Your core muscles are the group of muscles around your midsection or "core".  Major muscles included are the pelvic floor muscles, transversus abdominis (stomach muscles), multifidus (thin muscles on either side of the spine), internal and external obliques, rectus abdominis, erector spinae (sacrospinalis) (large muscles on either side of the spine) especially the longissimus thoracis, and the diaphragm. Minor core muscles include the latissimus dorsi, gluteus maximus, and trapezius.

This first core excercise requires little to no movement, only good form and it will kick your tail if you do it correctly!

Illustrations and advice are attributed to Abs Excercise Advice

1. Elbow Bridge Plank

Your Position

Start by lying face down on the ground or use an exercise mat. Place your elbows and forearms underneath your chest.

Prop yourself up to form a bridge using your toes and forearms

Maintain a flat back and do not allow your hips to sag towards the ground.

Target Muscles
The Core - Abdominals, Hips, Back

Step By Step Instructions
Hold this position *focusing on tightening your abs* until you can no longer maintain a flat bridge. For beginners, start with 10 seconds.  Do approximately 3 sets slowly working your way up to 60 seconds per rep.

Return to start position.

Beware of Cheating!
Remember to not let your hips and back sag. This exercise will only be effective if you work to maintain a flat line from your shoulders to your feet. You might want to start in front of a mirror to learn the technique.


Side Plank

Your Position
Lie on your side with your right hand on the ground or use an exercise mat. For beginners, it is recommended to begin this exercise on your elbow.

Lift yourself up to form a plank with your right arm straight and your left arm on your side.


Target Muscles
The Core - Abdominals, Hips, Back


Step By Step Instructions
Hold this position for the recommended number of reps (start with 8-12). Repeat with the other side.

Beware of Cheating!
Remember to keep your body in a straight line, tightening your abs and butt muscles. You might want to start in front of a mirror to learn the technique.


After you learn these two excercises and can practice them with good form, you can progess to the simple push-up.  Now many people will tell me "I already know how to do a push-up!  Why are you telling me again?" 

The question is not do you know how to do them.....it is....do you know how to do them correctly?  The number one failure of a correct push-up is bad form.  Your bottom is sagging to the floor when you're in position or it is sticking high in the air.  When performed correctly, push-ups can be one of the most effective excercises out there. 

Guess what?  There is no equipment to buy, (You are walking around with it every day)  The only thing you need to perform it is a flat surface which you can always find, and willpower.  After you master the elbow front plank and side plank, you will be in the perfect position to do a perfect push-up.  The reason your bottom sags to the floor is from a weak core.  When you stick it up in the air, you are compensating for that weakened core.  After your core is strong, you'll get more out of your workouts, feel and look better in your clothes and be stronger than you ever were before.

There are many kinds of push-ups but today we will focus on the standard, two handed, shoulder width variety.

"Wall" press-ups are performed by standing close to a wall and pushing away from the wall with the arms; one can increase the difficulty by moving your feet farther from the wall.


"Table" or "chair" press-ups are performed by pushing away from a table, chair, or other object. The lower the object, the more difficult the press-up. You should be sure that the object is securely stationary before attempting to press up from it.

"Modified" or "ladies'" press-ups are performed by supporting the lower body on the knees instead of the toes, which reduces the difficulty. This is useful for warm ups/downs, pyramids/drop sets, endurance training and rehab. It can also be used to train in a more explosive plyometric manner (like clapping pushups) when you can't perform them with the feet. It can also be used with the 1-arm variations as a transition.

Image: from Wikipedia
US Marines count out pushups.

If you are not an athletic person, take care to start with the Wall Presses first.  After you are very comfortable with them, progess to theTable / Chair presses.  Finally graduating to the Floor push-ups when you gain your strength.  Aim to do enough repetitions that you can feel the exertion but not so much that you hurt yourself gradually working your way up.  Getting the proper benefit from excercise will involve some pain and sacrifice, but not at the expense of your health.  I personally aim for approximately 1000 push-ups per week in varying form and most times I achieve it.  However, I am not yet where I want to be physically and I want to incorporate some more excercises in my routine..   

Your goals may be more or less but the important thing to do is get moving!!   These are only a few few of the body weight excercises that you can do and in coming days I can cover more of them.  Tell me what you would like to see in the comments....

Tuesday, August 24, 2010

Tasty Tuesday! GF Penne Genovese

Wow I am sooo sleepy today!  I got up early this morning and went for a short walk as it was about to rain again!  Twice in one week, woohoo!  I spent the weekend with friends and was very busy but had a great time.  We got several things accomplished, went to the races, and even got a little lake time thrown in for good measure.  I got quite a bit of sun and I am somewhere around that fine line between just enough and too much sun.  It was never painful but we'll just have to wait and see if I start peeling. (Don't you just love when your face peels from a sunburn! Lol)  People look at you and say "Got yourself a sunburn, didn't you?"  Like you didn't know already....

My neck and back feel like a million bucks today thanks to Dr. Martinez, my esteemed chiropractor.  Anytime you need services in Tulsa, OK you should give him a call.  He is verrrrry good.  Yes, I get charged regular price, and no I don't get discounts for plugs on the blog.  Lol.  I do however, believe in telling others when you get a good product or service, so I do that here to let the readers know....

With all that sun and the rain today I am super sleepy but determined to carry on in honor of you, the readers.  I have more Dutch Oven recipes ready to post but this week wanted to put up another 5* recipe for those fans.  If you are new to the site, you can find navigation buttons for popular topics under the header.  If you scroll down to Labels on the right side you can find all of the subjects I blog about including Dutch Oven recipes, Diet & Nutrition, and many other topics.

This post is a fantastic Penne Genovese recipe from Michael Fusco's Riverside Grill in Tulsa, OK.  If you haven't eaten there you should try it once.  I guarantee you will go back again and again.  This recipe is a favorite of mine and it is sooo delicious! I haven't had it in way too long but am glad to share it here.  Why is it that many of our all time favorite dishes only get made a handful of times a year??  I know it happens to me more than it should and was just curious if anyone has the answer....Alright let's get to the recipe!  Serves 4

Ingredients

4 sprigs fresh basil (for garnish)

4 Tbsp basil pesto or more

3 oz. olive oil

2 Tbsp grated Pecorino Romano cheese

2 Tbsp toasted pine nuts

Salt & Pepper to taste

1 lb imported penne pasta (Your favorite GF pasta or DeBoles makes a good one)

1 gallon water

2 Tbsp salt


In a saute pan, heat a touch of white wine and olive oil to medium heat. 


Add pesto and pine nuts.  Saute until aromatic.

Bring salted water to boil and add penne.  Stir occasionally & cook until al dente.  Drain excess liquid.


Toss pasta in hot pesto.  Remove and place in bowl.  Top with Pecorino & garnish with basil tops.

Pesto is one of those things that many people love, myself included, but know very little about.  It can be found in many places but the best known locale is Genoa, Italy.  In ancient times, the extra basil crop was made into paste and mixed with lemon juice and covered with oil for preservation.  Traditional pesto consists of basil, garlic, olive oil, pine nuts, cheese and lemon juice.

This dish, as you see here, was served with a couple slices of pork tenderloin for added flavor or maybe because I looked really hungry that night!  It can be served with an added meat like the pork loin or it is also an excellent stand alone dish.  It has been a couple of weeks since I have had this and just looking at the pictures and writing this post makes me hungry.  I better go see what I can do to remedy that.......Enjoy!!

This post is part of the following blog carnivals.....Go check out these great sites!!

Monday, August 23, 2010

Good News Monday!

I was driving down the street this morning after leaving my chiropractor's office, Dr. Tomas Martinez, who saved me this morning by the way.  If you live in, around, or are passing through Tulsa, OK you should go see him!!  I was having some neck and back pain and he had me feeling relief in just a short time.  When you go see him tell him Jason said "Hi!"

Back to my line of thought......I was driving this morning listening to a local radio station when I heard an advertisement for Cancer Treatment Centers of America.  They were talking about their world class hospitals, physicians, quality of care etc. and it was a fine commercial.  I was in that state of mind where you are driving, thinking about 4 other things and you are faintly aware of the radio in the background.  As the commercial was going on I heard the words "Naturopathic Medical Doctor" or NMD and I immediately started listening closely. 

                                                             Photo Credit CTCA
                  Naturopathic clinicians at CTCA at Southwestern Regional Medical Center, discuss naturopathic therapies to complement your traditional cancer treatments
                           
It turns out that CTCA has now incorporated Naturopathic medicine in their treatment program!  Well don't I feel special!!  Now I am not a Naturopathic Medical Doctor but I do sell natural products and work closely with one, Dr. Jack Wise.   You can read all about him and one of the cutting edge formula's he has created for Celiac disease, Intestinal Calm, by clicking the link on his name.  There are also some products for kidney stones and Lyme disease that I will cover in more detail later. 

What struck me is that for as many years as I can remember, people only believed in chemo, radiation, and surgery for cancer treatment.  The reason they did so was because of the relentless advertisement by the pharmaceutical companies and the medical community.  While these policies have had some success, I have seen the successful treatment of untold individuals after their medical doctors told them their options were exhausted and to enjoy their last weeks / months of life.  These people refused to give up their love of life and rightly so.  They came to the Naturopath community and with the proper care and treatment, made a full recovery!

So the question I am asking myself is........"Have these centers like Cancer Treatment Centers of America finally come to realize the benefits of Naturopathic medicine and / or are they responding to the growing demand from the public?"  Perhaps both but either way I am glad to see it and look forward to the future of medicine.

Here is what I found on Cancer Treatment Center of America's website concerning Naturopathic doctors and their incorporation into the treatment program.....(click the link on their name)  I would encourage you to watch the video on the top of the page and pay particular attention to the Director of Naturopathic Medicine, Dr. Kristen Stiles Green, ND.  She is stating very well the case that I have known for years, essentially that the body is a many faceted organism with complex functions (my words) that has a great ability to heal itself with proper nutrients, minerals, diet, etc....  The human body is an amazing thing and we would do well to listen to it and treat it properly.  Reaching for a chemical every time you have a sniffle, sneeze, or cough is not necessarily the right or healthy thing to do.  Kudos to Cancer Treatment Centers of America for incorporating Naturopathic medicine into their programs in the fight against cancer!! 

Friday, August 20, 2010

Back To School Friday

As the title of the post implies, today was back to school for my boys.  They are young, 7 & 8 respectively, and on the way to school, gave me detailed instructions on what they expected from me.  Now I generally give the instructions in my home but I raise my boys to be articulate so I was curious what they had on their minds.  It turned out to be something that is on the mind of many children around the country these past few weeks......"Dad, if you're gonna give us a kiss you better do it before we go inside!  We don't want you to do that in front of our friends!!"  I burst out laughing and told them that I would respect their wishes today but that all other days were fair game and you shouldn't ever get too old for affection.  We went to their new classrooms, met the teachers and saw many other kids, a lot of them "old" friends.  Many times I think they were just born yesterday and they'll probably be asking for the truck keys tomorrow.

Now that the kids are back in school, its time to get back to the blogging today and show you an article on a study of leafy greens and their link to lower type 2 diabetes.  I will do more in-depth articles in the coming days on diet and diabetes but thought this one would whet your thirst for knowledge.

Read this article from Yahoo and Health Day News..........

Green, Leafy Vegetables Linked to Lower Type 2 Diabetes Risk


FRIDAY, Aug. 20 (HealthDay News) -- A new analysis of existing research suggests that eating more green, leafy vegetables can significantly reduce the risk of developing type 2 diabetes, but more study is needed.

An estimated 6.4 percent of people in the world have diabetes, and the rates of type 2 diabetes have been going up in the United States as the population has become more overweight, the authors of the analysis noted. Scientists have been trying to understand the role that diet plays in the development of the disease.

Researchers, led by nutritionist Patrice Carter at the University of Leicester in the United Kingdom, examined six studies that looked at the links between diet and the incidence of type 2 diabetes. They found that compared with those who ate the least amount of green, leafy vegetables (0.2 servings daily), people who ate the most (1.35 servings daily) had a 14 percent reduction in risk for type 2 diabetes.

However, the analysis didn't show that increasing overall intake of fruit, vegetables, or a combination of both would make a significant difference in risk, Carter and colleagues reported in the Aug. 19 online edition of the BMJ.

Still, in the analysis authors concluded that "increasing daily intake of green, leafy vegetables could significantly reduce the risk of type 2 diabetes and should be investigated further."

Diabetes researcher Jim Mann, who co-wrote a commentary accompanying the analysis, said in an interview that the findings don't change the general message of the medical community that people should eat lots of fruits and vegetables.

The research is "a reminder of just how important dietary factors are in reducing the risk of type 2 diabetes. There's far more evidence for this than for any drug treatments," said Mann, a professor in the department of human nutrition at the University of Otago in New Zealand.

In regard to green, leafy vegetables, Mann wrote in his commentary that it may be reasonable to draw attention to their potential benefits and that they could be incorporated into one of the five recommended portions of fruits and vegetables a day. In an interview, he added: "Though they are certainly a potential component of a diet likely to reduce the risk -- not only of diabetes but all chronic disease -- the message needs to go beyond green, leafy vegetables."

Wednesday, August 18, 2010

Beginners Guide to Living Gluten Free

I am honored to do a Wednesday guest post for A Moderate Life this week. Thanks Alex!  She and I have teamed up this week to make a "Beginners Guide to Living Gluten Free". For those of you that don't know me, I am Jason, the host of Alternative Health & Nutrition News and I have been involved with natural health remedies for many years. I see and visit with people all over the US and many other countries about their health issues and sell all natural products for many conditions ranging from Lyme disease and migraines to depression.

With that said, one of my favorite topics is Celiac disease, a much misunderstood condition that is gaining widespread attention as you the public, and also the medical community become more aware and gain understanding of this auto-immune disorder. Celiac disease is a chronic hereditary condition characterized by the body's inability to absorb gluten. Celiacs have an inability to digest gluten, and to put it simply when gluten is ingested, it causes inflammation of the intestine or "gut". The villi of the small intestine in a healthy person resemble shag carpet if you will and in a Celiac, looks more like Berber. This inflammation and thus the truncation of the villi cause the body to be unable to absorb nutrients, vitamins and minerals that it needs to be healthy. Because of this truncation or flattening of the villi, Celiacs only absorb approximately 10% of their nutrients.

It can affect very young children, or can also be "triggered" later in life as an adult by a stressful event. It is known that Celiac disease is directly linked to many other diseases / disorders such as Failure to Thrive in infants, Anemia and Depression to name a few. While Celiac disease can be challenging, there are many things you can do to make your life much better. The first step is eliminating gluten from your diet. With this post, I want to help you with the first steps that you and your family would take in dealing with Celiac disease.

The questions that we will answer today are:

1. What is gluten?

2. What foods can you keep?

3. What must you throw out?

4. What do you need to do to eliminate gluten from your life and your home?

Many families have struggled with multiple "diets" in which one person eats gluten free and other members do not. Often times, when one person has Celiac disease, the entire family goes gluten free to ensure the health of the affected member.

To answer the 1st question: What is gluten?

Gluten (Latin meaning "glue") - is composed of two proteins, gliadin and glutenin. Together with starch, gluten makes up a large percentage of the protein in wheat seeds. It is naturally present in all grains such as wheat, barley and rye. Since it lives up to its Latin definition of "glue", it is widely used as a binder in many foods and gives bread dough its elasticity and workability. As mentioned above, Celiacs have an inability to digest gluten, and to put it simply when gluten is absorbed, it causes inflammation of the intestine or "gut" and thus the truncation of the villi and malabsorbtion of nutrients. This reaction / inflammation to gluten is often painful and many Celiacs can become very sick if they have an accidental ingestion.

In answer to the 2nd question: What foods can you keep?

The question all Celiacs want to know..... “Can I keep my favorite foods? Oh my goodness I love this or that sooo much!” I understand completely! I have so many favorite foods that it shows! If I was stranded on a deserted island with only coconut milk and water to drink, I could go a week + and my wardrobe would thank me. The question you have to ask yourself is.....Will I miss my favorite food when I feel so much better after removing the gluten from my life? The answer is not much.....When you discover your health again, removing certain foods will be a very small price to pay. Let’s get to the foods you can keep!

Note: I am not getting into the issues of casein, dairy, nuts, and other related food allergies with this post. Since this is a beginners guide to celiac, I will deal only with the gluten issues. If you wish, we can get into more detail in future posts.

Natural / Unpackaged, Unprocessed (ex. not lasagnas, frozen dinners)

Meats - Beef, Fish, Pork, Chicken, Shrimp, etc....

Fruits - Watermelon, Apples, Pears, Bananas, etc.....

Vegetables - Peppers, Spinach, Broccoli, Potatoes etc.....

Nuts - Almonds, Pecans, Cashews, Peanuts, Pine nuts (except wheat, barley, rye)

Sweeteners - Agar, Agave, Sugar, Honey, Sorghum, Xylitol

Starches - Rice, Enriched rice, potatoes

Seasonings - All natural sea salt, fresh ground pepper, thyme, basil, etc. (Beware of packaged shakes, rubs, flavorings or even natural ground products as they may have gluten or wheat as a binder / filler. They could also have been processed in a wheat containing facility so it is very important to read labels on these products.)

Beans - White, Black, Navy, Kidney, Green, etc....

Cheese - Cream cheese, aged cheeses (Except Bleu cheese)

Farm or Dairy - milk, eggs, sour cream, (Do not keep your ice cream until you look at the label!)

If I listed every product / ingredient you could keep, this list would be 3 pages long with verrrrry small type. My goal is not to list every single one in this post but instead to give you a good baseline and allow you to work from there. We can expand at a later date. :)

Now that you have a basic understanding of the naturally gluten free foods, we will move on to the foods that you MUST get rid of to lose the gluten. These items contain gluten naturally or in some cases will, with rare exception, have gluten in them as an additive.

In answer to the 3rd question: What foods must I throw out? (Or give to hungry neighbors)

Grains - wheat, barley, rye, spelt, etc...Anything that names wheat is to be avoided (wheat germ, wheat grass, wheat berries, etc......Buckwheat is unrelated and safe) Also any version of the word barley or rye is to be avoided.

White Flour, Enriched Flour, etc - contains wheat in most all cases unless it specifically says Gluten Free or is made from Rice, Potato, Millet, Quinoa etc....(These are safe)

Pasta - This one makes a LOT of people sad but it is almost always made with Durham wheat or Semolina so it's a no no. (There are some GF versions on the market such as rice and buckwheat pastas, look carefully!!)

Hot & Cold Cereals - again most are made with the forbidden grains. (You can buy GF versions in some popular brands but make sure you look closely. They will often advertise Gluten Free on the package.)

Dairy - Ice creams are often made with gluten as a binder / thickener. Look closely at the label or make your own.

Soups / Sauces - Packaged and canned soups / sauces almost always have flour as a thickener. (Many packaged foods will initially look safe but often have a sauce containing gluten which will cause problems. Check labels carefully!) Soy sauce is a definite danger item. There are some gluten free versions but you can have an accidental ingestion with many brands of soy.

Breads – For the most part will contain wheat and therefore gluten. There are some very good gluten free alternatives from companies such as Bob’s Red Mill. Also keep in mind that many brands of various mixes can be misleading. Many Celiacs might buy the prepackaged cornbread mix that calls for egg and milk and pop it in the oven not realizing it can contain a large amount of flour even though it is a cornbread mix. Be vigilant in reading labels. It cannot be stressed enough!!

Shampoos, Conditioners and Hairsprays – This is a stealth item that many people don’t consider. Dependant upon the sensitivity of the person, many will have reactions as these they can contain gluten or wheat. Not all brands will contain gluten but you again must check the labels.

In answer to the last question: What do you need to do to eliminate gluten from your life and home?

The answer sounds deceptively simple and is very necessary. You must become extremely aware of all the ingredients in your home and life.  People often go out to eat or rush to the local drive-thru without a second thought and if they have that ability, good for them.  Celiacs, however, must be hyper-aware of all things around them and develop a love for reading labels on the foods they purchase.  Your food package will not have in large, bold, letters I HAVE GLUTEN! on the front so you know to avoid that product.  It is much more passive than that.  You will have to read the labels thoroughly and have an understanding of the main sources and also "hidden" sources of gluten in your life. 

For many years, the medical community has stressed a gluten free lifestyle as the only solution to Celiac disease and for many years this was the case.  However in the past few years there has been an exciting breakthrough in the natural health field concerning celiac disease.  A product, Gluten Sensitivity Formula, has treated over 700 patients and been through a double blind medical study conducted by a renowned Tulsa internist, Dr. Jerome Block MD FACP.  Visit my blog and read Wise Formula Wednesday to learn about the creator, Dr. Wise, and the ingredients of the formula.

I hope this guest post has been as fun for you as it has for me. I urge you to read, be vigilant, and above all, have fun.  Any day that you are on the green side of the grass is a good day.  If you would like to find some great Gluten Free recipes as well as health information and more information on Celiac disease, please visit my blog, Alternative Health & Nutrition News.

Many thanks to the incomparable Alex of A Moderate Life for the opportunity to be a guest host as I have had more fun than is possible for a Wednesday…. Enjoy!!

Tuesday, August 17, 2010

Tasty Tuesday! GF Dutch Oven Pineapple U/D Cake

I woke up to an unfamiliar sound this morning.  It woke me from a deep sleep and I sat up, confused and not sure of where I was.  This strange sound was coming from outside.  I jumped out of bed and ran to the window, unable to see because it was not quite light outside.  I went to the back door and stepped out on the patio and all of the sudden my feet were wet!  It was RAINING!!  I had planned some outside work today and now had to reschedule but was glad to do it.  We have had soooo many days of 100+ degree weather and I couldn't remember the last time it had rained.  As far as I am concerned this is a great day, no matter what else happens.

My boys are going to start school at the end of this week and are really excited.  We got their new shoes last night and I had to make them put them back in the box so they wouldn't get messed up before school starts.  They also helped in the making and mixing of the Pineapple U/D Cake this morning so if it doesn't turn out I'll blame it on them.....:) 

I found this recipe on a great site, Byron's Dutch Oven Cooking by the way.  There are a lot of great recipes and many of them can  be modified to be Gluten Free.  Lets get to the recipe!   The ingredients are as follows:

This 12" holds 2X the volume of my 10"

Dutch Oven 12"

4 Tbsp butter

1 cup brown sugar

8 pinapple rings

8 maraschino cherries

1 GF cake mix

1 cup pineapple juice

1/3 cup water

3 eggs

1/3 cup oil


Prepare Cake Topping: Melt butter in bottom of a 12" Dutch oven. Sprinkle brown sugar evenly over butter being careful not to touch the sugar once it has begun to dissolve into the butter. Carefully place pineapple rings on top of the brown sugar, 7 around the outside and 1 in the center. Place a maraschino cherry in the center of each pineapple ring.

My pic didn't turn out so bueno here.....Grrrrrr


Prepare Cake Batter: In a mixing bowl combine cake mix, pineapple juice, water, eggs and oil; mix well. Spoon cake batter carefully over the top of pineapple rings. Spread batter evenly to edges.

Bake: Cover Dutch oven and bake usinge 10-12 briquettes bottom and 14-16 briquettes top for 45 minutes or until top of cake springs back when touched.

Let the cake cool for 10 minutes or so in the oven with the lid cracked. Next run a rubber spatula around the inside edge of the oven to loosen the cake. To turn the cake out, first lay a piece of parchment paper across the top of the oven so it lays flat and replace the lid so that it holds the paper in place. Make sure you have an available lid stand resting on your table for the next step. Using gloved hands place one hand on the lid and the other hand under the oven and carefully lift and flip the oven over so the cake falls onto the lid. Rest the oven upside down on the lid stand and tap the bottom and sides of the oven lightly with your hand to make sure the cake didn't stick. Then lift the oven off the lid. The cake will be resting on the parchment lined lid and can be cooled this way or slid off the lid using the parchment paper. Allow cake to cool slightly before service.

Two of the pineapples stuck to the bottom of the oven but I put them back in place.

There is the finished product!  I can't remember the last time I made a Pineapple U/D Cake and this is the first time ever in my Dutch Ovens but it turned out really good.  I would like to hear some more Dutch Oven recipes if anybody has some good ones. 

Be sure to come back tomorrow for a post on "Beginners Guide to Living Gluten Free".  I have teamed up with Alex from A Moderate Life this week to inform, educate and hopefully entertain many of you on the first steps of living a gluten free lifestyle.   Enjoy!!

This post is part of the following blog carnivals......Go check out these great sites!!


Monday, August 16, 2010

Money Saving Tips

I admit it......I'm just as guilty as the next person.  With neighborhood markets on every corner and the local shopping warehouse just down the street selling everything from weed killer to playdough I forget that many of the everyday staples in our lives can be adaptable.   I've heard the stories from parents, grandparents and more telling how they did this and that with salt, baking soda and other necessities around the house but often I forget and run to the store for a stain remover or scouring pad when all I need to do is look in the cabinet for the familiar package of salt for a quick fix. 

Read this article from Yahoo...........

46 smart uses for salt
by Yahoo!Green, on Mon Aug 9, 2010 4:49pm PDT
By Melissa Breyer


                                                                                                            (Photo: Getty Images)
 How many ways can you use salt? According to the Salt Institute, about 14,000! The salt website has tons of handy tips for using salt around the house, and the best of the bunch -- plus my additions -- are listed below.

I can't think of another more versatile mineral. Salt is the most common and readily available nonmetallic mineral in the world. In fact, the supply of salt is inexhaustible.

For thousands of years, salt (sodium chloride) has been used to preserve food and for cleaning, and people have continued to rely on it for all kinds of nifty tricks.

So with its nontoxic friendliness and status as an endlessly abundant resource, let's swap out some toxic solutions for ample, innocuous, and inexpensive salt.

There are a number of forms of salt produced for consumption (and by default, housekeeping!): unrefined salt (such as sea salt), refined salt (table salt), and iodized salt. Kosher salt is sodium chloride processed to have flat crystals. And in case you're wondering, Epsom salt is an entirely different stuff: magnesium sulfate to be exact (which is a salt that I consider to be, essentially, miraculous).

Here are just a few of the many ways you can put salt to good use in your home:


In the Kitchen

Aside from all of the alchemy that salt performs in terms of baking chemistry and food flavor, salt has a number of other great applications in the kitchen.


Test egg freshness.

Put two teaspoons of salt in a cup of water and place an egg in it -- a fresh egg will sink, an older egg will float. Because the air cell in an egg increases as it ages, an older egg is more buoyant. This doesn't mean a floating egg is rotten, just more mature. Crack the egg into a bowl and examine it for any funky odor or appearance -- if it's rotten, your nose will tell you. (Bonus fact: if you have hard-boiled eggs that are difficult to peel, that means they are fresh!)


Set poached eggs.

Because salt increases the temperature of boiling water, it helps to set the whites more quickly when eggs are dropped into the water for poaching.


Prevent fruits from browning.

Most of us use lemon or vinegar to stop peeled apples and pears from browning, but you can also drop them in lightly salted water to help them keep their color.


Shell nuts more easily.

Soak pecans and walnuts in salt water for several hours before shelling to make it easier to remove the meat.


Prevent cake icing crystals.

A little salt added to cake icings prevents them from sugaring.


Remove odors from hands.

Oniony-garlicy fingers? I like soap and water, then rubbing them on anything made of stainless steel (it really works), but you can also rub your fingers with a salt and vinegar combo.


Reach high peaks.

Add a tiny pinch of salt when beating egg whites or whipping cream for quicker, higher peaks.


Extend cheese life.

Prevent mold on cheese by wrapping it in a cloth moistened with saltwater before refrigerating.


Save the bottom of your oven.

If a pie or casserole bubbles over in the oven, put a handful of salt on top of the spill. It won't smoke and smell, and it will bake into a crust that makes the baked-on mess much easier to clean when it has cooled.


                                           mosquitobite
Personal Care

Extend toothbrush life.

Soak toothbrushes in salt water before your first use; they'll last longer.


Clean teeth.

Use one part fine salt to two parts baking soda -- dip your toothbrush in the mix and brush as usual. You can also use the same mix dissolved in water for orthodontic appliances.


Rinse your mouth.

Mix equal parts salt and baking soda in water for a fresh and deodorizing mouth rinse.


Ease mouth problems.

For cankers, abscesses, and other mouth sores, rinse your mouth with a weak solution of warm saltwater several times a day.


Relieve bee-sting pain.

Ouch? Immediately dampen area and pack on a small pile of salt to reduce pain and swelling. More bee-sting tips here.


Treat mosquito bites.

A saltwater soak can do wonders for that special mosquito-bite itch -- a poultice of salt mixed with olive oil can help too.


Treat poison ivy.

Same method as for treating mosquito bites. (Salt doesn't seem to distinguish between itches.)


Have an exfoliating massage.


After bathing and while still wet give yourself a massage with dry salt. It freshens skin and boosts circulation.


Ease throat pain.

Mix salt and warm water, gargle to relieve a sore throat.


Around the House

Deter ants.

Sprinkle salt at doorways, window sills, and anywhere else ants sneak into your house. Ants don't like to walk on salt.


Extinguish grease fires.

Keep a box of salt near your stove and oven, and if a grease fire flares up, douse the flames with salt. (Never use water on grease fires; it will splatter the burning grease.) When salt is applied to fire, it acts like a heat sink and dissipates the heat from the fire -- it also forms an oxygen-excluding crust to smother the fire.


Drip-proof candles.

If you soak new candles in a strong salt solution for a few hours, then dry them well, they will not drip as much when you burn them.


Keep cut flowers fresh.

A dash of salt added to the water in a flower vase will keep cut flowers fresh longer. (You can also try an aspirin or a dash of sugar for the same effect.)


Arrange artificial flowers.

Artificial flowers can be held in place by pouring salt into the vase, adding a little cold water and then arranging the flowers. The salt become solid as it dries and holds the flowers in place.


Make play dough.

Use 1 cup flour, 1/2 cup salt, 1 cup water, 2 tablespoons oil, and 2 tablespoons cream of tartar. Stir together flour, cream of tartar, salt, and oil, and slowly add water. Cook over medium heat stirring frequently until dough becomes stiff. Spread onto wax paper and let cool. Knead the dough with your hands until it reaches a good dough consistency. (Read about juice dyes here.)


Repair walls.

To fill nail holes, fix chips or other small dings in white sheet-rock or plaster walls, mix 2 tablespoons salt and 2 tablespoons cornstarch, then add enough water (about 5 teaspoons) to make a thick paste. Use the paste to fill the holes.


Deter patio weeds.

If weeds or grass grow between bricks or blocks in your patio, sidewalk, or driveway, carefully spread salt between the cracks, then sprinkle with water or wait for rain to wet it down.


Kill poison ivy.

Mix three pounds of salt with a gallon of soapy water (use a gentle dish soap) and apply to leaves and stems with a sprayer, avoiding any plant life that you want to keep.


De-ice sidewalks and driveways.

One of the oldest tricks in the book! Lightly sprinkle rock salt on walks and driveways to keep snow and ice from bonding to the pavement and allow for easier shoveling/scraping. But don't overdo it; use the salt sensibly to avoid damage to plants and paws.


Tame a wild barbecue.

Toss a bit of salt on flames from food dripping in barbecue grills to reduce the flames and calm the smoke without cooling the coals (like water does).


Cleaning

Salt works as an effective yet gentle scouring agent. Salt also serves as a catalyst for other ingredients, such as vinegar, to boost cleaning and deodorizing action. For a basic soft scrub, make a paste with lots of salt, baking soda and dish soap and use on appliances, enamel, porcelain, etc.


Clean sink drains.

Pour salt mixed with hot water down the kitchen sink regularly to deodorize and keep grease from building up.


Remove water rings.

Gently rub a thin paste of salt and vegetable oil on the white marks caused by beverage glasses and hot dishes on wooden tables.


Clean greasy pans.

Cast-iron skillets can be cleaned with a good sprinkling of salt and paper towels.


Clean stained cups.

Mix salt with a dab of dish soap to make a soft scrub for stubborn coffee and tea stains.


Clean refrigerators.

A mix of salt and soda water can be used to wipe out and deodorize the inside of your refrigerator, a nice way to keep chemical-y cleaners away from your food.


Clean brass or copper.

Mix equal parts of salt, flour, and vinegar to make a paste, and rub the paste on the metal. After letting it sit for an hour, clean with a soft cloth or brush and buff with a dry cloth.


Clean rust.

Mix salt and cream of tartar with just enough water to make a paste. Rub on rust, let dry, brush off and buff with a dry, soft cloth. You can also use the same method with a mix of salt and lemon.


Clean a glass coffee pot.

Every diner waitress' favorite tip: add salt and ice cubes to a coffee pot, swirl around vigorously, and rinse. The salt scours the bottom, and the ice helps to agitate it more for a better scrub.

                                              winestain

Laundry

Attack wine spills.

If a tipsy guest tips wine on your cotton or linen tablecloth, blot up as much as possible and immediately cover the wine with a pile of salt, which will help pull the remaining wine away form the fiber. After dinner, soak the tablecloth in cold water for 30 minutes before laundering. (Also works on clothing.)


Quell oversudsing.

Since, of course, we are all very careful in how much detergent we use in our laundry, we never have too many suds. But if someone overfills ... you can eliminate excess suds with a sprinkle of salt.


Dry clothes in the winter.

Use salt in the final laundry rinse to prevent clothes from freezing if you use an outdoor clothes line in the winter.


Brighten colors.

Wash colored curtains or washable fiber rugs in a saltwater solution to brighten the colors. Brighten faded rugs and carpets by rubbing them briskly with a cloth that has been dipped in a strong saltwater solution and wrung out.


Remove perspiration stains.

Add four tablespoons of salt to one quart of hot water and sponge the fabric with the solution until stains fade.


Remove blood stains.

Soak the stained cloth in cold saltwater, then launder in warm, soapy water and boil after the wash. (Use only on cotton, linen, or other natural fibers that can take high heat.)


Tackle mildew or rust stains.

Moisten stained spots with a mixture of lemon juice and salt, then spread the item in the sun for bleaching -- then rinse and dry.


Clean a gunky iron bottom.

Sprinkle a little salt on a piece of paper and run the hot iron over it to remove rough, sticky spots.


Set color.

Salt is used commonly in the textile industry, but works at home too. If a dye isn't colorfast, soak the garment for an hour in 1/2 gallon of water to which you've added 1/2 cup vinegar and 1/2 cup salt, then rinse. If rinse water has any color in it, repeat. Use only on single-colored fabric or madras. If the item is multicolored, dry-clean it to avoid running all of the colors together.

I was familiar with several of these salt uses but learned quite a few new ones myself.  What tips and tricks do you know of for this household staple??

Friday, August 13, 2010

Break The Mold Friday

I found an article today that was very intriguing to me as I have met many people in my life who didn't go to the gym because they didn't want to "bulk up".  I'll grant you, a lot of these people were women and as a huge fan of the fairer sex, I realize that you don't want to have big shoulders and rippling biceps.  I sure don't want your arms to be bigger than mine!

When ladies go to the gym, they often hit the treadmills, ellipticals, and do yoga or aerobics to lose weight or increase their stamina and often times to burn off steam with friends.  I have heard stories from men and women alike who hate weight lifting because....."Darn it, those things are heavy!"  People mistakenly believe that if you walk in the door of the gym, you have to grab the heaviest weight in the room for your workout.

This article touches on something that I have known for a long time but it is often ignored by the public because it doesn't fit the "mold" of, "If you want to build muscle you must lift heavy weight for a minimum of reps." (3-5 times)  What if you could build the muscle by using the opposite thought pattern?  Lift a light weight for a high number of reps (20-24 times)  Would you do it?  What if you could tone your body (ladies) or build bigger arms (guys) without the risk of injury to your back, legs, shoulders and more? 

Read this article from WebMD................

Want to Build Muscle? Light Weights Will Do

Straining to Lift Heavy Weights Isn't Necessary to Put on Muscle, Researchers Say

By Bill Hendrick
WebMD Health News                                                                            Reviewed by Laura J. Martin, MD

Aug. 13, 2010 -- Building muscle doesn’t require a lot of heavy lifting, just a lot of light weight lifting, a new study indicates.

Straining to lift very heavy weights isn’t the only way to pump up muscles, say researchers at McMaster University in Hamilton, Ontario. Similar results can be achieved, they say, by lifting light weights a greater number of times.

The secret is simply to pump iron until muscle fatigue sets in, says Stuart Phillips, PhD, associate professor of kinesiology at McMaster.

“Rather than grunting and straining to lift heavy weights, you can grab something much lighter but you have to lift it until you can’t lift it any more,” Phillips says in a news release.

The Study Method

Researchers recruited 15 healthy men with an average age of 21. Each was told to lift light weights and heavy weights with varying repetitions.

The weights represented a percentage of their best or heaviest lift. Heavier weights were set to 90% of a man’s best lift, and light weights at 30%.

Phillips says weights set to 80% to 90% of a person’s best lift required five to 10 repetitions before fatigue set in. At 30%, it took at least 24 lifts before similar fatigue developed.

The researchers measured fatigue at the cellular level by examining results of muscle biopsies done 4 hours and 24 hours after workouts.

Similar amounts of protein used in muscle building were produced whether volunteers lifted at 90% of their maximums until they ran out of steam and when they lifted only 30% of their best until they could lift no more, the researchers say.


Straining Not Necessary

In short, the authors say, similar muscle mass can be built by using light weights as with heavier ones.

“We’re convinced that growing muscle means stimulating your muscle to make new muscle proteins, a process in the body that over time accumulates into bigger muscles,” Phillips says. “We’re excited to see where this new paradigm will lead.”


What It Means

The research has practical significance, and not just for body builders, because building muscle is important for people with compromised skeletal muscle mass, such as the elderly, cancer patients, or people recovering from trauma, surgery, or even stroke, the researchers conclude.

They didn’t measure actual muscle growth, relying instead for their conclusions on the cellular markers.

But the findings are nevertheless promising and need to be replicated in future research, the authors write.

Nicholas Burd, a PhD student and author of the study, and his colleagues, write that a “high-volume low-load resistance exercise” program may help reduce loss of muscle tissue that occurs as part of the natural aging process.

Lifting Lighter Weights Is Safer

At the same time, lifting lighter weights many times may reduce soft tissue and orthopaedic injury, the study says.

The findings suggest that low-load lifts performed with numerous repetitions or high-load muscle-stretching efforts “will result in similar training-induced” muscle growth, “or even superior gains,” the authors write.

The study is published in the journal PLoS One.
 
Another subject I will touch on next week is using simple body weight excercises with light cardio to get you in the best shape of your life.  What are your gym stories??  Do you have a membership?  To go or not to go?